Overview:
Before Getting Started You Will Need The Following:
- An existing Sinclair phone extension – if you didn’t have a phone extension on campus, you will not be able to utilize the Mitel App
- Create an incident via the Help Desk at to request the Mitel Mobility App
- This will allow network engineers to properly apply the mobility license to your extension and initiate the configuration on the Mobility Router
- The IT Help Desk is available every day from 6 AM to Midnight:
- 937-512-HELP (4357)
- Email - helpdesk@sinclair.edu
- Via a web browser - http://selfservice.sinclair.edu
- Apple or Android Smart Phone
- Mitel Connect App from Apple or Google Play Store
- Wi-Fi or Cellular Connection
- Network Username (first.lastname ONLY – do not include @sinclair.edu)
- Network Password
Steps:
Application Installation:
- Download and install the Mitel Mobile Application from the Apple or Google Play Store
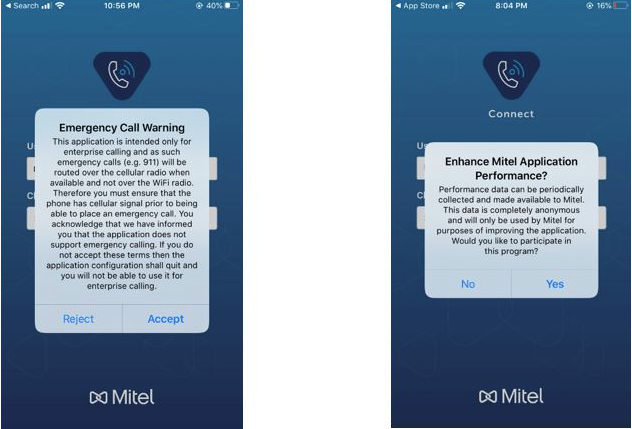
- Upon launch, Accept the Emergency Call Warning and say No to the “Enhance Mitel Application Performance” notification
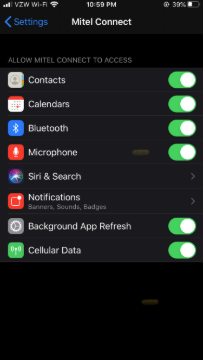
- If prompted, allow the newly installed application to access your Microphone, Contacts, Calendars, Bluetooth, Background App Refresh, Allow Notifications, and Cellular Data.
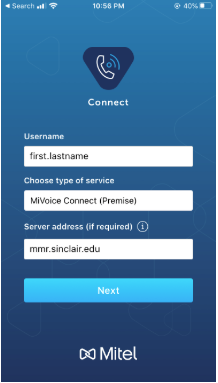
- Login with the following and click next
- Username: first.lastname ONLY (Sinclair USER ID do not include @sinclair.edu)
- Type Of Service: MiVoice Connect (Premise)
- Server Address: mmr.sinclair.edu
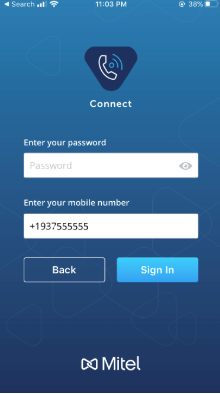
- Enter your Sinclair Network password and mobile number if it is not already populated and click sign in
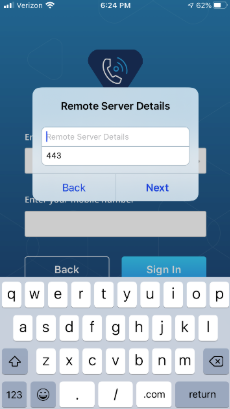
- You may be prompted to enter the Remote Server Details once more
- Remote Server Details: mmr.sinclair.edu
- Port: 443
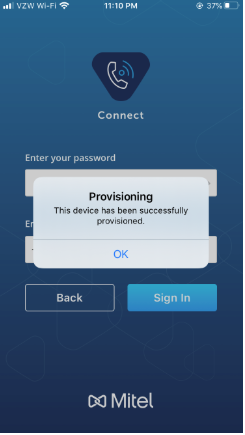
- You will then receive a “Provisioning” popup stating the device has successfully been provision, click OK
- Click the gear in the top right corner of the app and click VOIP Settings
- Ensure the following are toggled on
- Over Wi-Fi
- Over Cell Data
- Keep Wi-Fi Connected
- Automatic Handover
- Ensure the following are toggled on
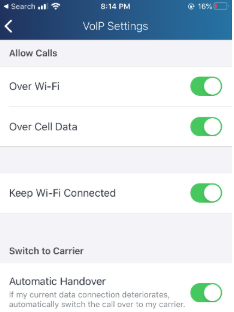
- Once your settings are changed, click the back arrow to return to the settings screen. Then click the X to return to the home screen within the Mitel App
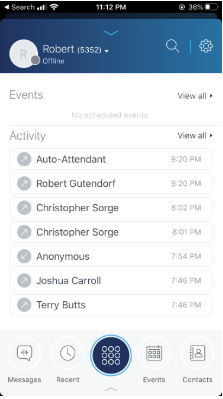
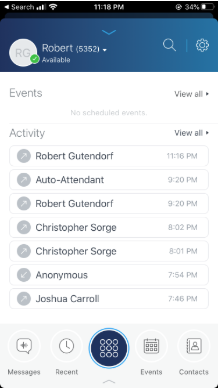
- It can take up to 5 minutes for your application to go from an “Offline” state to an “Available” state as your phone properly registers on Sinclair’s VOIP network. If you try to make a phone call in the “Offline” state prior to being registered, you will have audio issues (You will not be able to hear your callers). Please wait until your state changes to “Available”.
Testing:
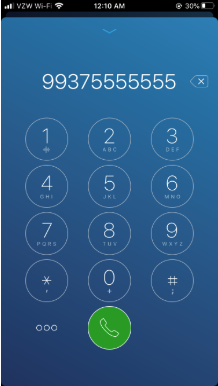
- Call any internal number. X4357 is a good test. If you are prompted to press a button, internal calls are working.
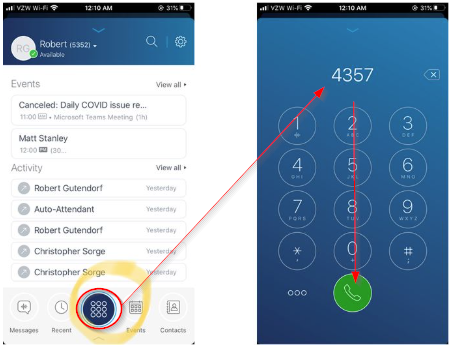
- Then try to call any external number (any cellphone number, etc.) to verify external calls are working. Remember, you will have to dial 9 first, just like you are on Sinclair’s campus.